App infrastructure evolution with AWS: Part 1
Published on 5/6/2024

Photo by Taylor Vick on Unsplash
This is the first part of a series of posts about the evolution of web app infrastructure. In this series, we will explore the evolution of web app infrastructure from a simple single server monolithic deployment to a 3-tier, fault tolerant, scalable, secure and Highly available deployment.
Background
When an application is in its early stages, it's traffic is relatively low and in most cases a single server deployment will do the job. As the application grows, the traffic will increase and the application will need to be able to handle the increased load. In order to keep up with the demand and maintain a good user experience, the application will need to be able to scale. One would ask, "Why don't we just have a full blown 3-tier solution right from the start?" The simple answer is cost and not knowing the features you would want to add in the future. A 3-tier solution is more expensive to implement and maintain than a single server deployment. So, it makes sense to start with a single server deployment and then evolve the infrastructure as the application grows.
Part 1: Single server deployment
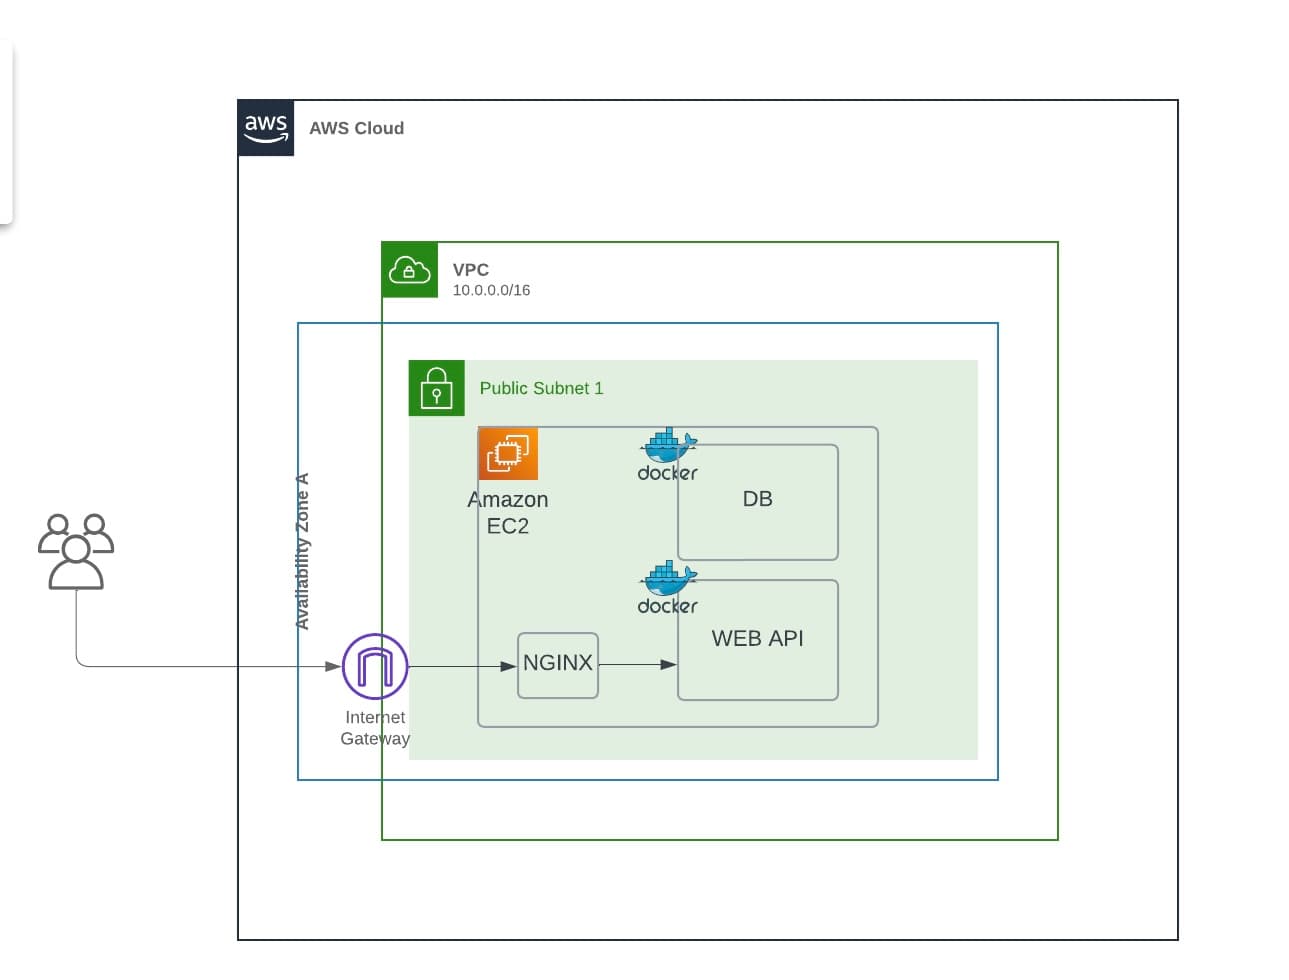
We're going to deploy a node.js api on a single EC2 instance. We will create the following resources:
- Custom VPC with 1 public subnet
- Internet Gateway
- Web Access Security Group
- EC2 instance
- Route Table
- Route Table Association (associate the route table with the public subnet)
- Add a route to the route table to the internet gateway
We're going to use a cloudformation template included in the repository
Cloudformation template
Parameters:
  KeyName:
    # ...

  POSTGRESDB:
    #...

  POSTGRESUSER:
    #...

  POSTGRESPASSWORD:
    # ...

Resources:
  VPC:
    # ...

  InternetGateway:
    #...

  AttachGateway:
    # ...

  PublicSubnet:
    # ...

  RouteTable:
    # ...

  InternetRoute:
    # ...

  SubnetRouteTableAssociation:
    # ...

  SecurityGroup:
    # ...

  Instance:
    # ...

      UserData:
        # ...
Outputs:
  # ...
I collapsed the resources configurations for brevity. You can find the full cloudformation template here https://github.com/mactunechy/hono-api/blob/main/cloudformation_template.yml.
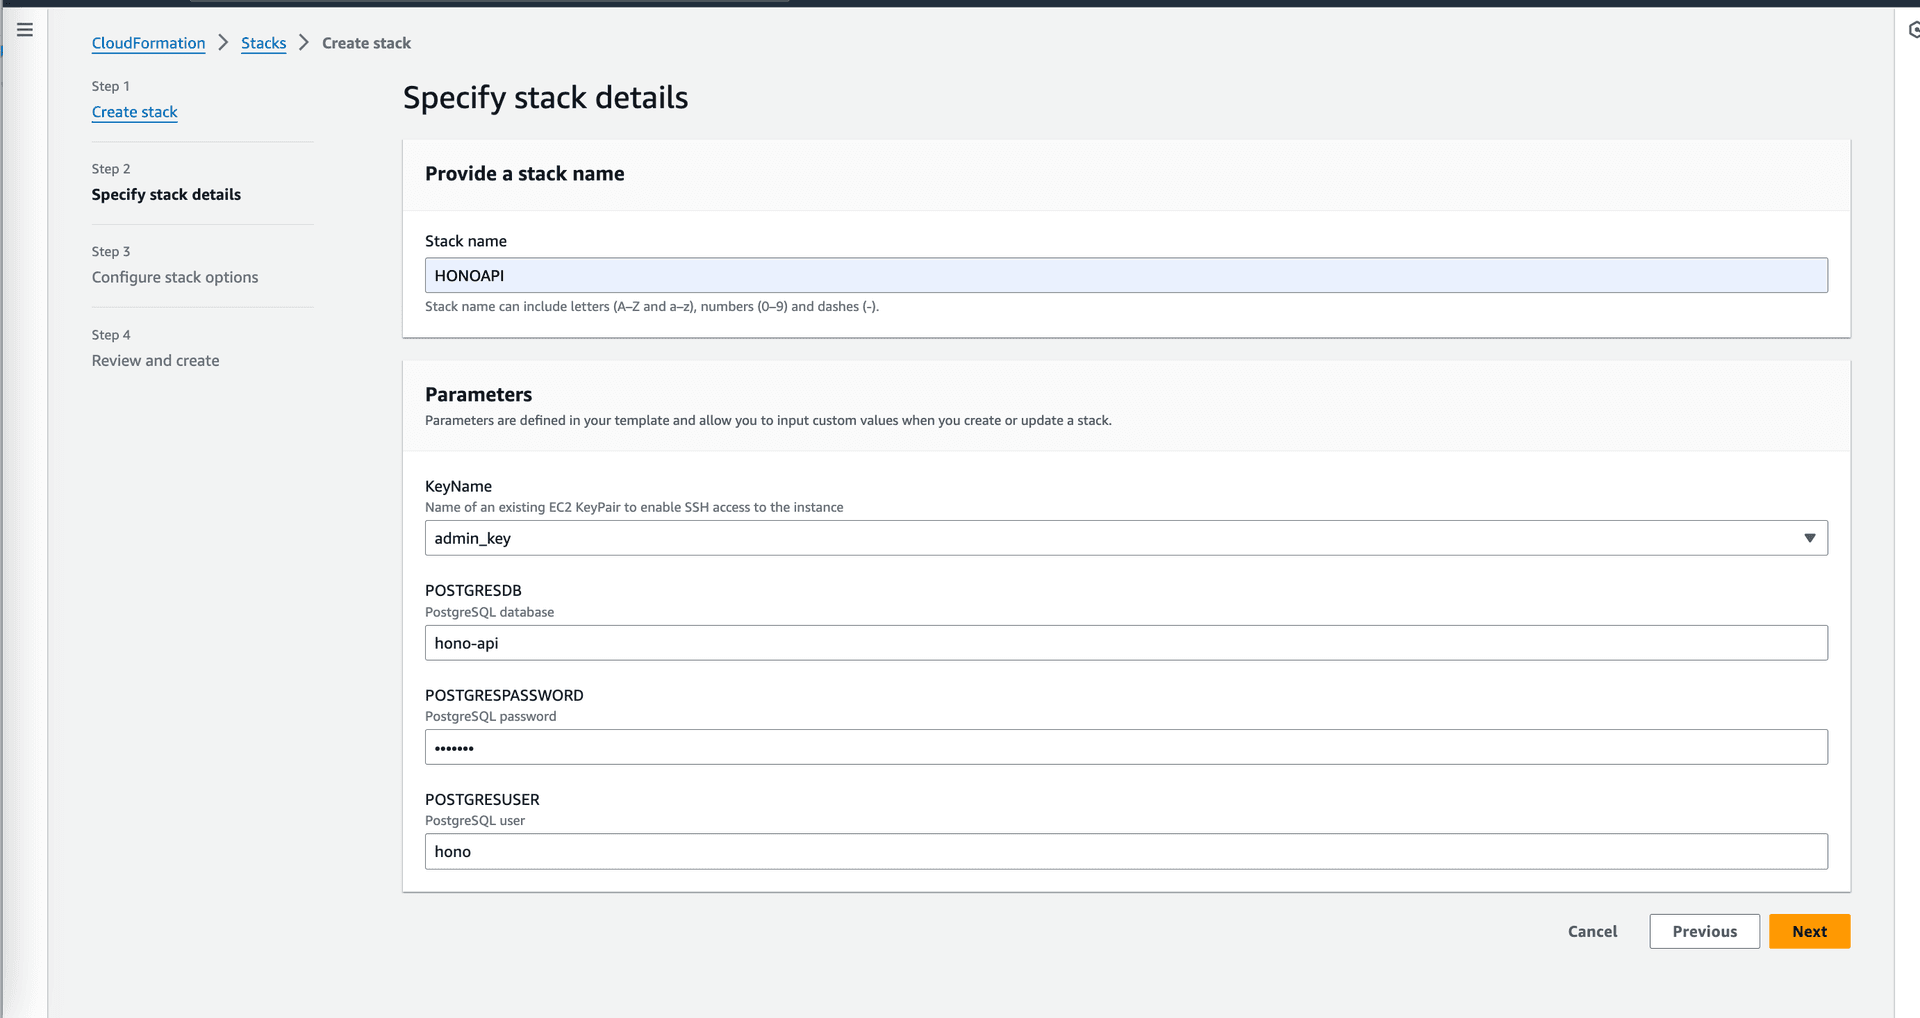
Parameters
The cloudformation template takes in the following parameters:
-
KeyName: The key pair to use to connect to the instance via ssh. In this case we probably don't need it because all the post deployment configuration is done in the user data script.- Note: Head over to the EC2 console and create a keypair if you don't have one. You will need it if you want to ssh into the instance.
-
POSTGRESDB: The name of the database to create -
POSTGRESUSER: The username to use to connect to the database -
POSTGRESPASSWORD: The password to use to connect to the database
We also passed the db credentials here, to avoid hardcoding them in the user data script.
You might have notice the ugly casing of the parameters 😅. This is because cloudformation doesn't support snake case. You can use camel case or pascal case.User Data
      UserData:
        Fn::Base64: !Sub |
          #!/bin/bash
          sudo yum update -y
          sudo yum upgrade -y
          sudo yum install -y git
          sudo yum install -y docker
          sudo usermod -a -G docker ec2-user
          sudo service docker start
          sudo chkconfig docker on
          sudo curl -L "https://github.com/docker/compose/releases/latest/download/docker-compose-$(uname -s)-$(uname -m)" -o /usr/local/bin/docker-compose
          sudo chmod +x /usr/local/bin/docker-compose
          sudo yum install nginx -y
          sudo service enable nginx
          sudo systemctl start nginx
          sudo mkdir /etc/nginx/sites-available
          sudo touch /etc/nginx/sites-available/honor_api.conf
          echo "server {
            listen 80 default_server;
            location / {
              proxy_pass http://localhost:3000;
              proxy_http_version 1.1;
              proxy_set_header Upgrade \$http_upgrade;
              proxy_set_header Connection 'upgrade';
              proxy_set_header Host \$host;
              proxy_cache_bypass \$http_upgrade;
            }
          }" | sudo tee /etc/nginx/sites-available/honor_api.conf > /dev/null
          sudo ln -s /etc/nginx/sites-available/honor_api.conf /etc/nginx/conf.d/
          sudo systemctl restart nginx
          git clone https://github.com/mactunechy/hono-api.git
          cd hono-api
          newgrp docker
          export POSTGRES_USER=${POSTGRESUSER}
          export POSTGRES_PASSWORD=${POSTGRESPASSWORD}
          export POSTGRES_DB=${POSTGRESDB}
          export POSTGRES_HOST=db
          export DATABASE_URL=postgresql://${POSTGRESUSER}:${POSTGRESPASSWORD}@db:5432/${POSTGRESDB}
          docker-compose up -d
          docker-compose exec api npx prisma migrate deploy
          docker-compose exec api npm run seed
Let's talk about the user data section of the cloudformation template. The user data section is a script that runs when the instance is launched. In this case, we're installing:
gitdockerdocker-composenginx
After installation, we use docker-compose to start the node.js api service and postgres database service. We also run the prisma migration and seed scripts to create the database schema and seed the database with some data.
Reverse proxy with Nginx
Our node.js application runs inside our ec2 instance on port 3000. Inorder to access the application from the internet, we need to set up a reverse proxy with nginx. The reverse proxy listens on port 80 and forwards requests to the node.js application running on port 3000. The setup and configuration is baked into the user data script.
          echo "server {
            listen 80 default_server;
            location / {
              proxy_pass http://localhost:3000;
              proxy_http_version 1.1;
              proxy_set_header Upgrade \$http_upgrade;
              proxy_set_header Connection 'upgrade';
              proxy_set_header Host \$host;
              proxy_cache_bypass \$http_upgrade;
            }
          }" | sudo tee /etc/nginx/sites-available/honor_api.conf > /dev/null
          sudo ln -s /etc/nginx/sites-available/honor_api.conf /etc/nginx/conf.d/
          sudo systemctl restart nginx
Let's deploy
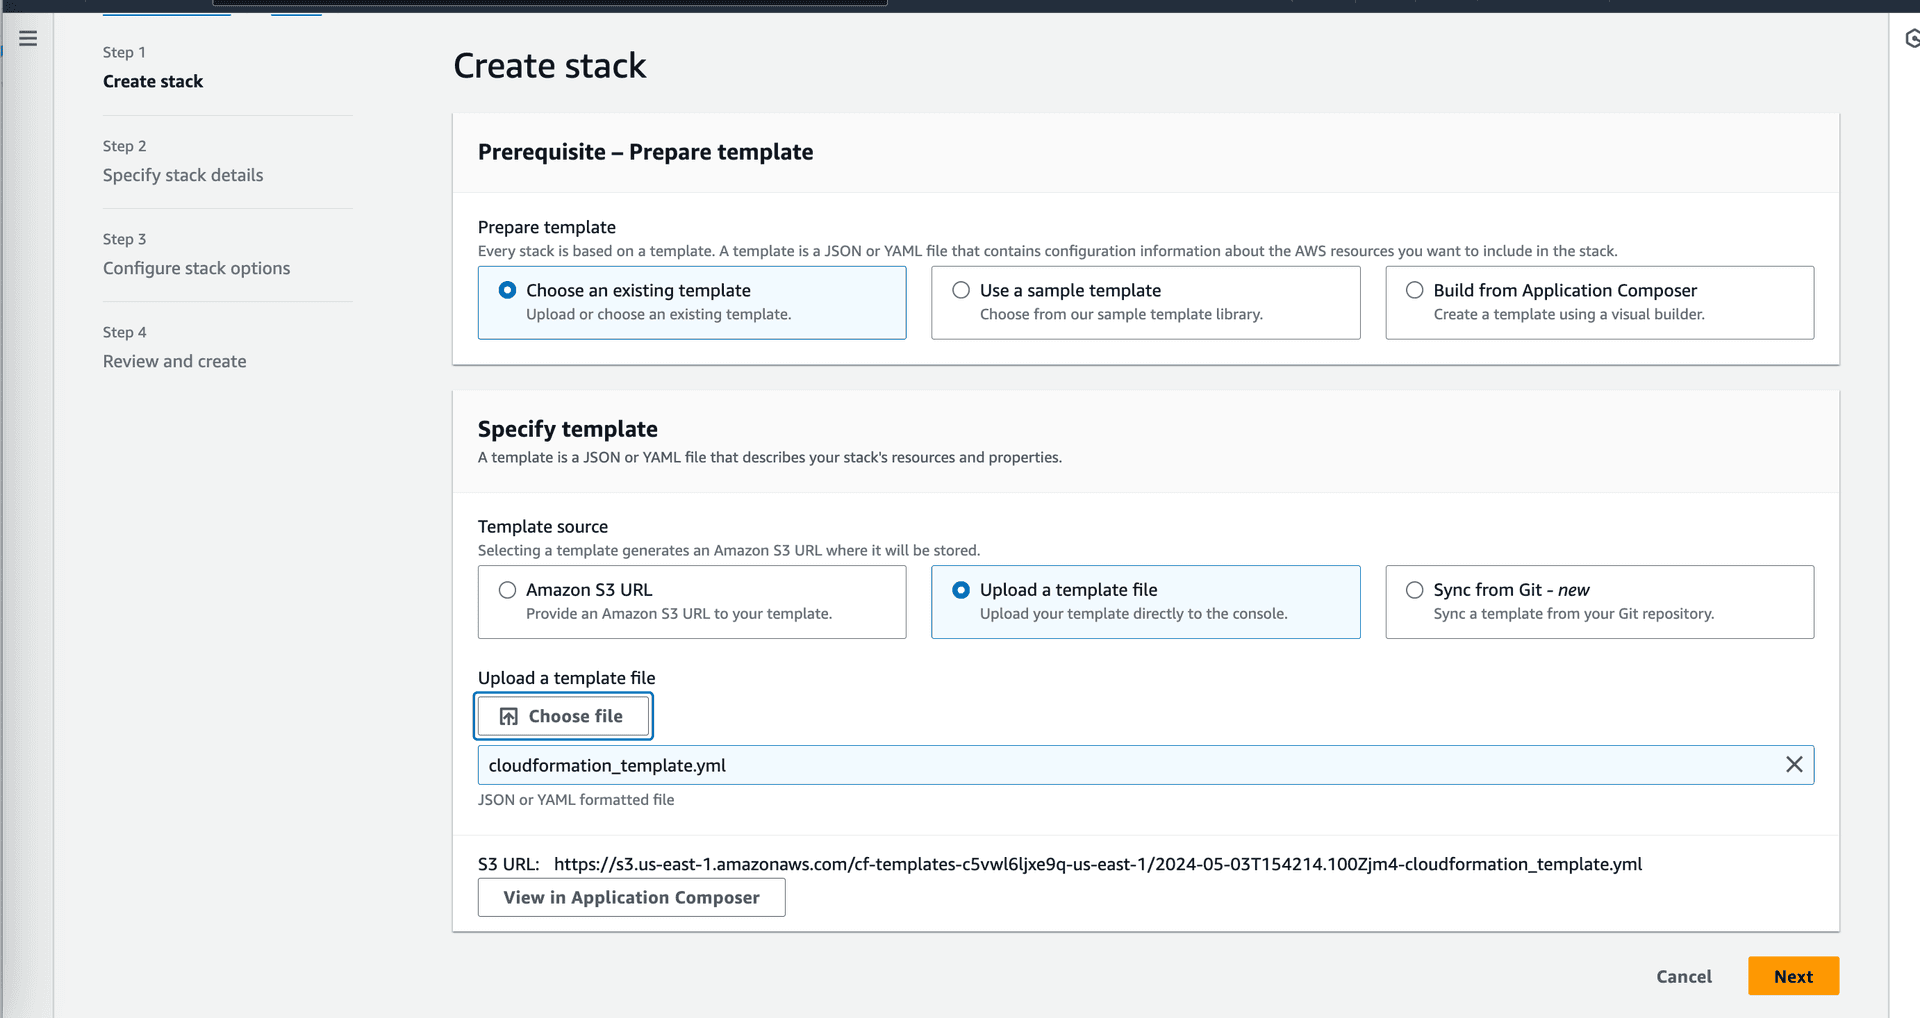
We need to simply log into the AWS console, navigate to the cloudformation service and create a new stack. We will upload the cloudformation template and fill in the required parameters. Once the stack is created
Clone the repo to you local machine so that you can access the cloudformation template and upload it to the AWS console.
Press next and fill in the required parameters. Once you're done, press next and create the stack. The stack will take a few minutes to create. Once the stack is created, you can access the application by navigating to the public ip of the ec2 instance. You can find the public ip in the output section of the stack.
Deployment complete
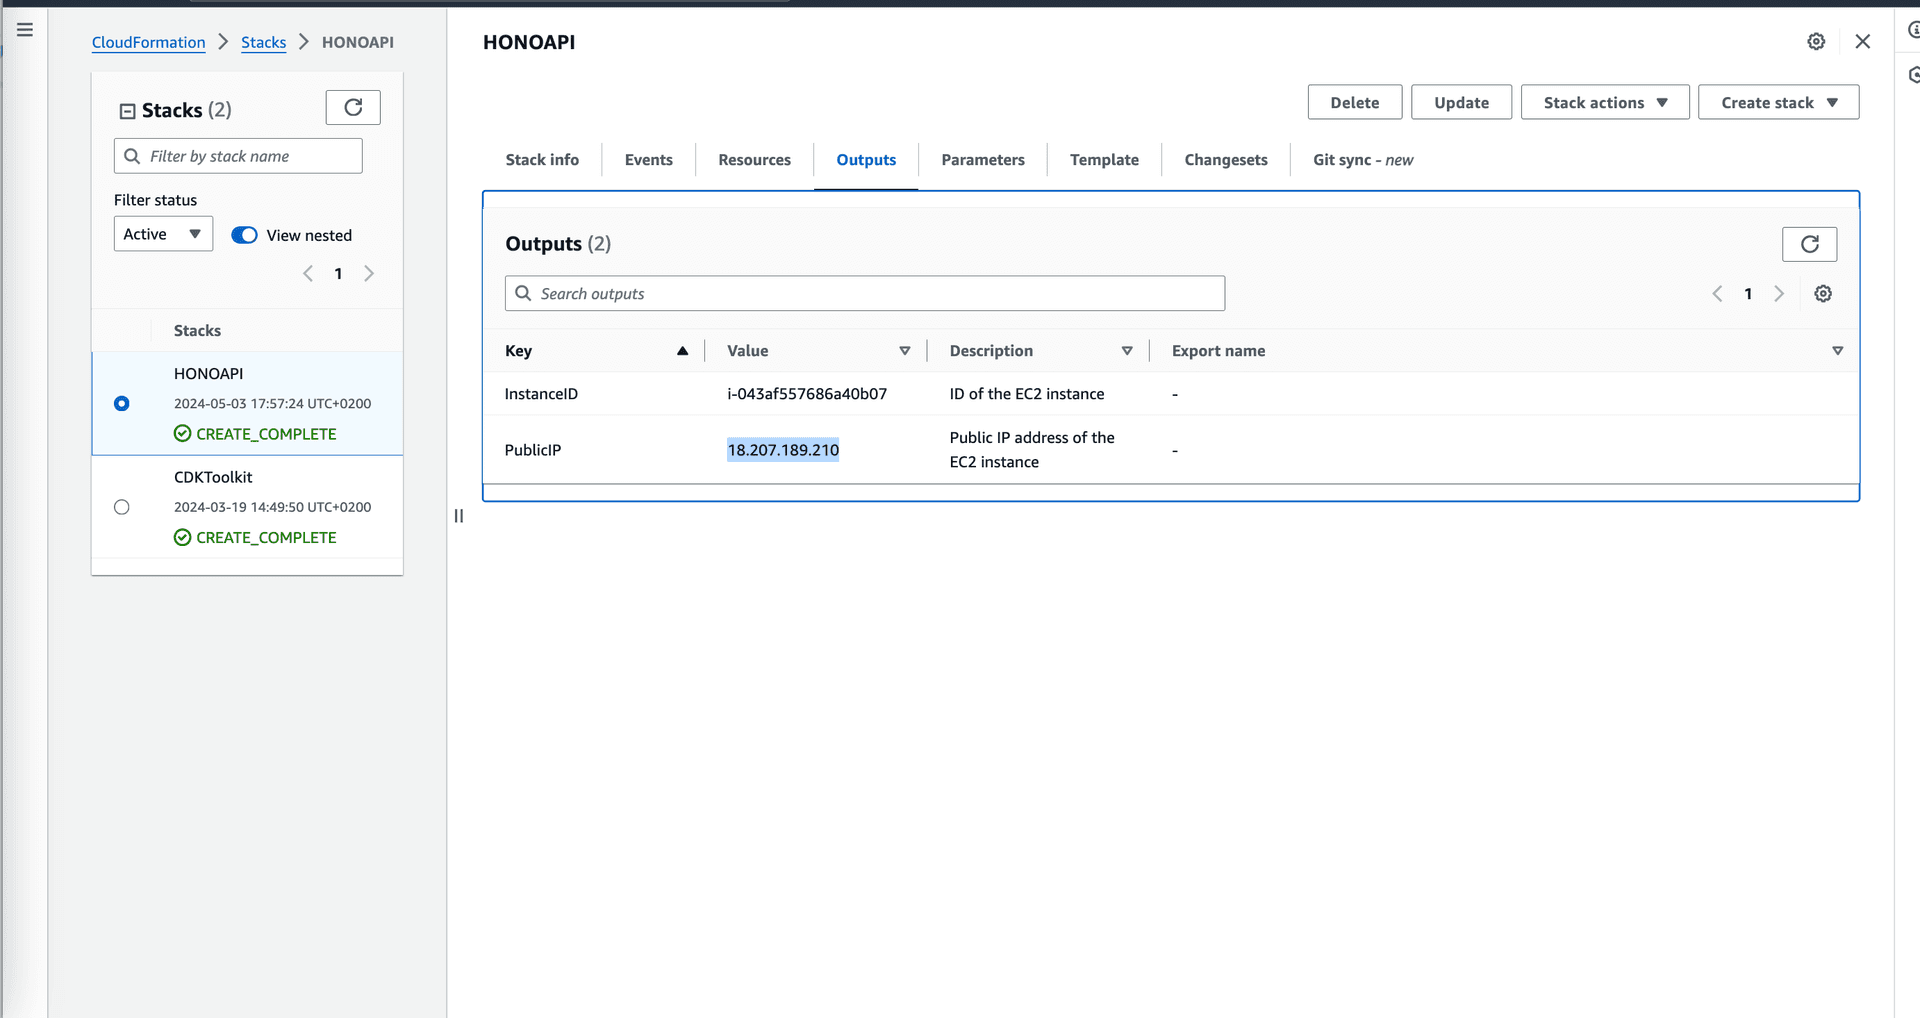
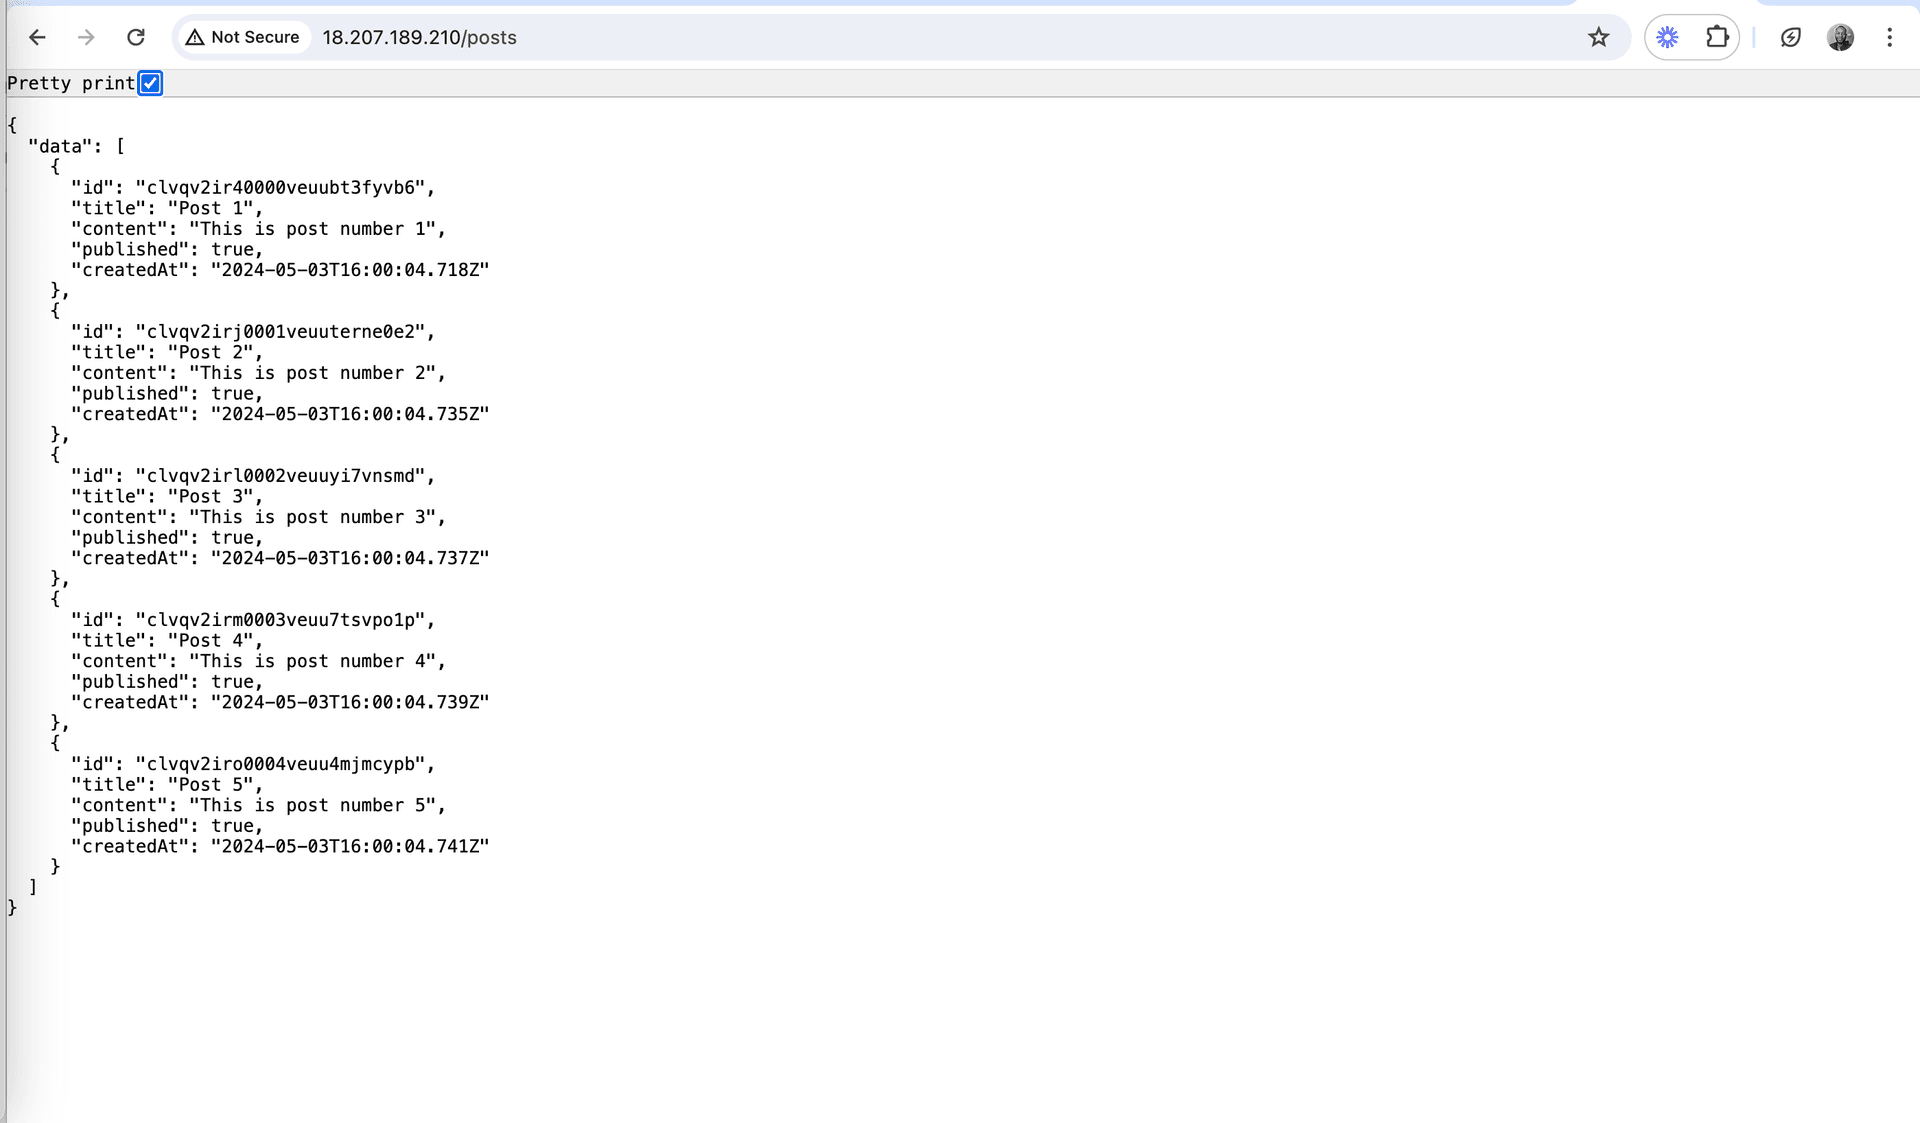
Copy the public ip and paste it in your browser and append /posts like so: <public_ip_address>/posts. If you get a 502 bad gateway error, wait a few minutes and try again. The error is because the application is still starting up. Once the application is up and running, you should see the following page.
Conclusion
That's it, we have deployed a node.js api in a single ec2 instance with just a few button clicks. In the next post, we will see how to add more instances and a load balancer to our infrastructure. In subsequent posts. we will potentially deploy a proper api integrated with a number of webservices and see how we can leverage the power of AWS to scale and secure our application. Stay tuned for part 2.😎
NOTE: Don't forget to delete the cloudformation stack once you're done with the tutorial. You don't want to incur unnecessary costs.